Sunday, August 25, 2013

Woodwork - Part 2

Continuing with the woodwork this past week.


Put the last coat of varnish on the door and the handrails.  Also put the vents back on the roof.


Here is the newly varnished "vee". Don't know what else to call it!


Installed new vents in both of the forward storage areas.


This past week, I cut most of the trim and teak veneer for the cabin electrical chase. Laid the first coat of thinned varnish today. Will probably put down a few more coats in the next few days.  Will likely need to put one or two coats after installation depending on if I have to cut any pieces on installation.


The new electrical closet after a few coats of varnish.  Starting to shine!


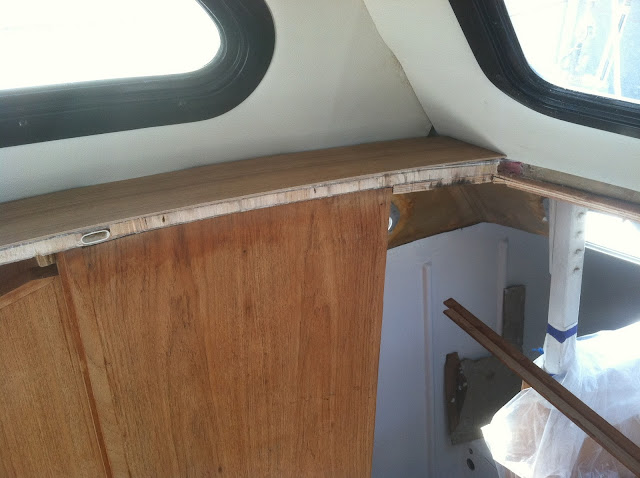
This is the area below the electrical closet.  I cut out another piece of teak veneer to enclose this area as well. Will add a drawer or door to access the area for storage.


Decided to lay down the first coat of thinned varnish on the port side and head.  Need to order more varnish!


While things dry, I decided to install the rotary helm.  I needed this installed to make sure I have clearance with the new electrical panels I install in the door.


Decided to install the wheel.  The rudders turn!

It is a 24" wheel.  Big enough to stand on the starboard side of the raised cabin and still steer.

The owl is too keep the crows and their poop off the boat.

Sunday, August 18, 2013

More Woodwork

Finished building the door and continued with interior woodwork this past week.


Here is the door placed to check the fit.


After one coat of Golden Mahogany stain.  Only left it on for about 5 minutes or less.  I did not want it to be too dark.


After one coat of thinned varnish and a second coat of full strength varnish.

The pieces below are the existing hand rails and vee that were on the cabin roof.  I am happy with the match between the mahogany and teak.


The other sided of the door shown with the RV window.  It has a slider with a screen.  The window looks a little skewed, but I just dropped it in for the picture.


This is the shelf on the starboard side. I added the pieces of wood shown to create a void for my electrical chase.


This is what it will look like when it is covered with a piece of teak veneer plywood.


Same thing on the port side.  Will finish the side off with some teak molding.


Hmm. what kind of junk will accumulate here?


This next week I will likely just add more coats of varnish to the door and other pieces of teak.   I need to focus.  I seem to keep jumping from one thing to another.


Thursday, August 8, 2013

Interior Work

Last weekend, I continued to focus on the interior.  Still want to work my way from ceiling to floor.


Also want to be able to enclose the interior.  The construction next to my house is making some serious dust so I need to be able to enclose the cabin before I start any serious varnishing.

First step is to clad the door frame with teak veneer.


Starboard side.


After door jamb is added.


Since the interior frame of the door is pretty much done, I started to lay out the framework for the door.  The top will have a sliding RV window.  The bottom will have a veneer plywood insert.  This is actually mahogany, which I bought before I realized the interior was teak!

I will attempt to stain the mahogany to try to match the color tone of the teak, before I varnish it.


This is the teak molding after 4 coats of Epifanes Woodfinish gloss varnish.  Today, I put a final coat of Epifanes varnish with UV inhibitors.


This is a close up of the teak molding.  There is some variation in the tone from one to the other, but I see a golden tone.  I bought some Golden Mahogany stain to use on the door.  We'll see if that works.


In the last couple of days, I built the frame for an enclosure above the settee.  It will house the wire terminal strip for the mast as well as a couple of puck lights.  I have a nice black Seth Thomas clock that came with the boat that I think will look nice mounted on the front.


This is the beginning frame work for an electrical chase that will take the wires from the starboard side to the port side.


Off to Las Vegas tomorrow for a boys weekend, so work will commence back next week.

Sunday, July 28, 2013

Back from Vacation..Back to Work!

Took my girls to visit my family in Louisiana week before last. Trying to ease back into boat mode!


Able to enjoy some time on the bayous of Louisiana!


The major work left is interior and rigging.  Decided I needed to close up the boat before I start the interior work.  Here is the new port and old round port installed.


New hatches installed.  This is where I planned on putting the batteries, but with all of the weight I have already added in the stern area, I am considering locating them either in the lazarette below the the helm or inside the cabin.  Stay tuned.


Installed the new ports on the interior of the hull as well.


Before installing the ports on the exterior of the hulls, I decided to lay out the gold stripe.


Happy with the outcome.


Remember stripe will depict an arrow to go with the Iroquois theme.  Here is arrow head forward.

Also installed navigation lights as shown.


And "feathers" or arrow fletching aft.


Decided to enclose this area to hide the back of helm area.  This shot shows the bottom frame added.


Finished the rest of the frame and added a teak veneer plywood with a cut out for the door.


With door added.


This is with door closed.  I used hidden hinges to give it a clean look.  I will likely add some molding to clean up the look and hide some of the rough edges.  My plan is to install the electrical panel in the door, so I can easily access the back of the panel.  It is big enough that I will likely install other items such as battery and LPG monitors, etc.


Trying to decide what to do next.   My "Plan" has slipped just a bit.  At the top of the list is to varnish the molding that will hold the liner in place.  I want to add more liner where the original windows are, using the window frames to hold them in place.  This is the last step in order to waterproof the cabin.  Well except for the door!


Sunday, July 7, 2013

Topsides Done!

Still working the Plan.  I was able to finish the topsides this week and a few other things.


On Monday, I finished prepping the hull for paint by sanding with 400 grit.  I then set up tarps around the boat.  Primarily to avoid direct sunlight while painting and also to protect the paint from any over night dew.


Prior to painting, I washed down the hull with Interlux Fiberglass Solvent Wash.  Here is the starboard side as I started the first coat on Tuesday.


This is another shot after the first coat.  I decided to tackle the paint job by myself.  You can see where I overlapped, which in itself proved to be a mistake.  After the second coat, I realized I would need assistance on the final coat to avoid overlap.


This is after the second coat on Wednesday.  While the over lap is not as visually evident, the surface was not as smooth at the over lap.  This happened because as I tipped the paint, I had to come back with the next rolled on paint and overlapped where I had just tipped.  In some places, it was okay, while others, there was a noticeable texture difference.  I ended up sanding those areas and enlisted help to paint the third and final coat.


This is after the 3rd coat on Thursday.  Hard to see the difference.  Also removed the masking from the boot stripe and bottom paint.


The port side actually got a fourth coat on Friday.  It was the side that we started first and there was a learning curve.  I decided to tip and let my son apply the paint.  It was his first time and there were too many areas where the paint was not applied evenly.  After that we switched jobs, it worked a whole lot better.


Here is a shot from the front.  The port lites and navigation light are just dry fit for the picture.


I decided to leave the underside the original gel coat.  It is still in good shape.


A shot of the backside with the rudder housings re-installed.  Also, not sure if I had posted a picture of the stern rails installed.


Close up of the rudder housing with the new stainless steel steering arm.  I will end up putting some overlapping rubber on the inside of the hull to limit any water coming in, through the slot, from following seas.


Installed the mechanism on Saturday.  This is the starboard side.


I decided to apply a couple coats of paint to the berth area.  My goal is to eventually place foam backed headliner to the walls and PVC bead board to the roof. But I am afraid that may very likely be an on the water project.  Just realized I did not paint the ceiling.  This is the port forward berth area.


Here is the head


And the other side of the head.  Unlike a lot of other Iroquois, which have been "rehabbed", I am trying not to paint over any of the wood.


This is the port aft berth.  The new port lites on either side and the paint, sure make a big difference in making this more inviting.  Still need another coat in the two aft berths.


And the starboard berth area.  Need to do some more finishing up on enclosing the electrical chase.


It was a very fruitful week.  In a few moments, I am off to start framing in the rear of the helm, where the electrical panel will be located.

Update:  

I wanted to post a shot of the topside paint finish.   Here it is:


So how do I feel about my handy work?   It is definitely a DIY paint job.  Not a mirror finish that I was hoping for, but for the money, I am satisfied.  Part of doing this blog is to show "how to" and "how not to" do something.  I don't mind showing my successes and failures.  So for future reference, I  used between 5 and 6 quarts of Interlux Perfection for the topside and probably about a half a quart for the boot stripe.  All in all, I probably have just under $500 in materials.  I am satisfied with that!