Friday, June 15, 2012

Filled in the Hole!

Today I made some progress toward filling in the hole from the companion way hatch and extending the roof.

I bought 2 - 24"x48" sheets of 1/2" balsa and cut to fit.


Notice I finally cut off the hatch rails and sanded the existing roof.


This is the underside of the roof extension.  Used temporary rafters to support the balsa.  In restrospect, I should have used a piece of luan to bridge the gaps between the rafters.  I think the balsa drooped slightly between.  Oh well that will get taken care of in fairing!


 The blue tape was just to stop any resin from leaking.


This is the underside of the companion way hatch hole.  I decided to at the mat and cloth in order to raise the balsa in line with the existing balsa.


Cut out the 1.5 oz. mat


Then the 7 oz cloth. 

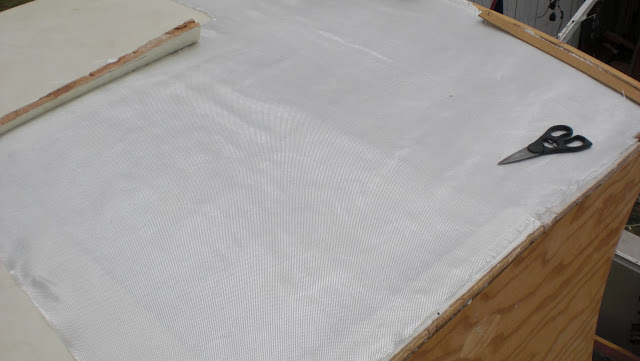
Then the wet out.  Ended up using 2 alternating layers of each fiberglass.


I purposely left the curved piece of wood aft high in order to stop water from dripping.  Will likely form a gutter along the edge of the top as well.

Saturday, June 9, 2012

Let the Fiberglassing Begin!

Well today I lost my fiberglass virginity.  I consulted with a local boat builder/supplier and went with vinyl ester resin.   I made too big a batch on my first wet out and it cooked with about half left.  Oh well trial by fire!


As suggested, I cut out all of the pieces first and numbered them accordingly.  This is the 1.5 oz. mat fiberglass


I used 1.5 oz mat and then 7 oz. cloth.  Left out the area that will be cut out for the window.  Why waste material?


Overlapped the joints between the port and forward walls.


I will add 3" fiberglass tape at all joints for extra strength.

That was a full days work.

Lessons I learned:


A roller works better than a brush on vertical surfaces.

Need to go to Harbor Freight and pick up some cheaper sponge rollers.  Home Depot is only a half a block away so I splurged!

When working alone, wet out the plywood first, then attach the mat.  You don't have time to place both mat and cloth with one layup.  I had to mix two batches for just about every strip area.

Let the residual resin cook and harden in the plastic container and pop it out so you can reused the container.

Latex/Nitryl gloves are worth their weight in gold.  Buy the 100 pack and change them often!

This is not rocket science, but I can see there are tricks to make this go smoother.


Wednesday, June 6, 2012

Ping Pong Tables Can Slow You Down

I bought my girls a ping pong table this past Saturday and they want me to play with them, so progress has been slow the past few days!


Started the temporary support structure for the 1/2" balsa core.  In this instance, I plan on fiberglassing the top first.  Fairly beefy door header.


Added the structure for the helm console.  I also doubled up ont the "arcs".  It is now 1" thick.


 Probably create a cubby on the port side of the companionway door.


This is the opposite side of the helm console.  Since I have no use for the drop down navigation table, I am likely going to salvage the wood to create the compartment  and door to access the mechanical and electrical system.


Shot from below.  The 2x4 in the middle is to help bend the aft piece of wood to conform to the shape of the existing roof.


Friday, June 1, 2012

Almost Ready for Fiberglass

Made some progress on Memorial Day and the last few days after work.  Replaced the luan with 1/2" thick marine plywood.  Using luan as a template was the way to go.


I used an elastomeric patch to fill in the gaps.  Somewhat unconventional, but just wanted to seal the join area so the vinylester resin does not seep through to the other side.


Used some screws to hold it togther temproraily unitl I fiberglass the inside.


I will rebuild a new door.  Not sure if the existing door is salvagable to build upon.  If I decide to leave the curved structure on the sides as shown, I will fix the starboard side so it extends all the way to the "bench" area just like on the port side. 


The plan is to build a console for the wheel steering and instruments where the old window was.   A new sliding window will take up most of the remaining area where the plywood is. 


Need to fill in the gap left by the sliding hatch and extend the roof back a few inches.  Will likely use 3/4" to 1" balsa to match the existing roof.  The hatch rails will be removed later.