Since I am going to use plywood for the sole, I needed to bridge the depression in the soles. These are 2" high pieces of wood that I tacked down with some all-purpose adhesive. I am going to use this cavity for an electrical chase. There is enough room on either side of the wood to run wires.
There is also room beneath to allow any miscellaneous water to sit without rotting the wood.
I went back in forth deciding how to adhere the wood to the fiberglass. Screws would have been easier, but I am not quite sure how thick the fiberglass is here. So I decided to tab it into place. I don't expect much lateral movement, so a couple of tabs on each end and side should suffice.
I then moved on to prepping the electrical chase, in the starboard berth area, for final facade. The strips of wood are backers that will provide something to screw into. I used the same adhesive to temporarily hold the strips of wood and then fiberglassed them in.
Here is a shot of the same area. The facade will be screwed to the backers so I can easily access the area if I need to run anymore cable or wires. I am going to install a 110V outlet on the forward facade.
Today, I cut the pieces of facade and gave it an initial coat of varnish cut with mineral spirits.
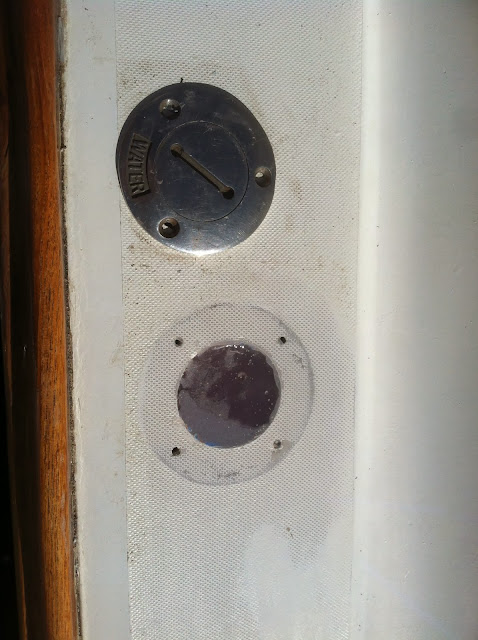
This is the hole where the water fill hose passed to get to the water bladder that the previous owner used. This location, required that the berth cushion be notched. I didn't care for that and did not want to see the exposed water hose.
So I decided to move the water fill location so that that the hose dropped down through the cubby storage area. Since I was mixing resin, I decided to fill in the old hole. I used 4 layers of different mat and fabric, with a backer piece of fabric on the bottom.
Since the resin ran aft, I filled in the area with this surfacing putty. I will then sand it down and cover with paint and non-skid when I do my touch up work.
This is the underside. I still need to apply some resin on the backer mat layer that I laid out prior to pouring the initial resin. You can see the new deck fill and the hole in the cubby storage area below it. The new water hose will run in the corner, down to below the storage area beneath the berth, where my new 9 gallon rotomold tank is.
While I was in the starboard berth, I remembered to take a photo of the PVC beadboard headliner. I have not trimmed it out yet, since I will need to remove it when I install the running rigging on the cabin top. This photo is a little funky. I was having problems with the rotation when imported into blog. Oh well, you get the idea!
On Friday, I installed the horn. button. Now I just need to figure out where to put the horn! I tried a couple of spots, but don't really care for those locations.
I heard back from CMC regarding the Tilt/Trim gauge. They think the problem is with the sending unit, which will cost $165 to replace! I will have to think about that. Problem is the hole for the gauge is already drilled!
I have a 3-day weekend coming up. I need to decide if I am going to start on the sole or not. I might just start prepping for the plumbing now that I have the water fill hole closed up.


No comments:
Post a Comment